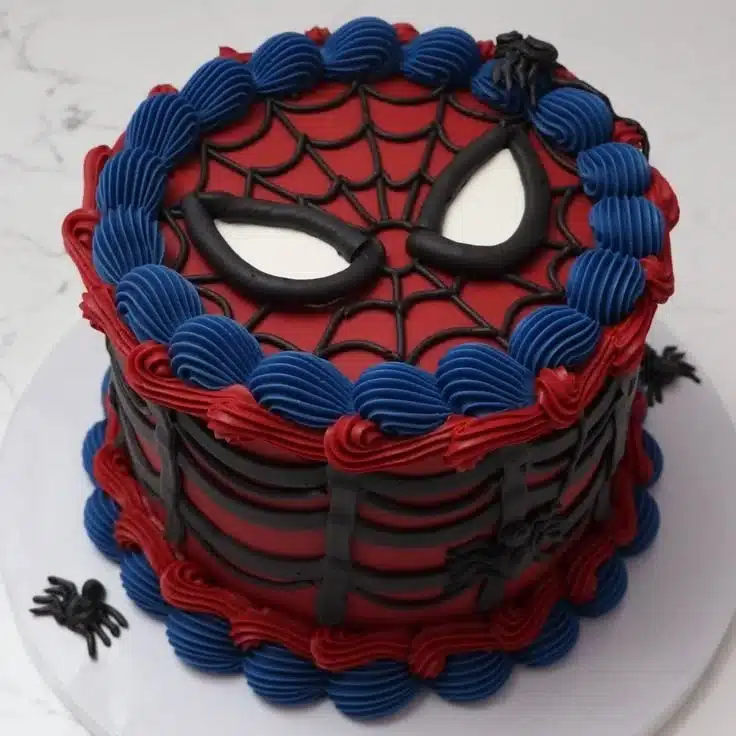
Why Make This Vintage Spider-Man Cake
Looking for a fun and delightful cake that will transport you back to childhood? The Vintage Spider-Man Cake is the perfect choice! Inspired by the classic superhero, this cake brings a nostalgic flair to any celebration. Whether it’s a birthday party for a young comic book fan or simply a treat to savor with friends, this cake not only looks incredible but also tastes divine. Its vibrant colors, soft texture, and delicious buttercream frosting will leave everyone raving about it. Plus, it’s simple enough that even novice bakers can create a masterpiece in their own kitchen!
How to Make Vintage Spider-Man Cake
Baking the Vintage Spider-Man Cake is a straightforward process that yields impressive results. You’ll get to enjoy the delightful smell of baking cake as it fills your kitchen. With its fun color scheme and marbled effect, this cake becomes an instant showstopper. Its layers of fluffy cake and rich buttercream create a harmonious blend of sweetness and nostalgia that looks good and tastes amazing. Get ready to impress your guests with this brilliantly crafted treat!
Ingredients:
- 1 ½ cups all-purpose flour
- 1 cup granulated sugar
- ½ cup unsalted butter, room temperature
- 2 large eggs
- ½ cup whole milk
- 2 teaspoons baking powder
- 1 teaspoon vanilla extract
- A pinch of salt
- Red and blue food coloring
- Buttercream frosting (store-bought or homemade)
- Spider-Man cake topper (optional)
- Edible glitter for a vintage effect (optional)
Directions:
- Preheat your oven to 350°F (175°C). Grease and flour a 6-inch round cake pan.
- In a mixing bowl, cream together the butter and sugar until light and fluffy, about 3-4 minutes. This step is crucial for a tender cake!
- Add the eggs one at a time, beating well after each addition. Stir in the vanilla extract, filling your kitchen with a delicious aroma.
- In another bowl, combine the flour, baking powder, and salt. Gradually add this mixture to the wet ingredients, alternating with the milk. Start and end with the flour mixture, and mix until just combined.
- Divide the batter into two bowls. Tint one bowl with red food coloring and the other with blue. Mix until the colors are vibrant—you want that superhero look!
- Pour the batters into the prepared cake pan in alternating spoonfuls to create a beautiful marbled effect.
- Bake for 25-30 minutes or until a toothpick inserted in the center comes out clean. The smell of baking cake will be irresistible at this point!
- Let the cakes cool in the pan for 10 minutes, then turn them out onto wire racks to cool completely.
- Once cooled, slice each layer in half horizontally to create four layers total. This will make for a tall and impressive cake!
- Assemble your cake by layering and frosting each cake layer generously with buttercream. Decorate as desired, adding a Spider-Man cake topper and a sprinkle of edible glitter for that vintage touch.
Nutritional Information
Per slice (1/8 of the cake):
- Calories: 260
- Total Fat: 14g
- Saturated Fat: 8g
- Cholesterol: 50mg
- Sodium: 100mg
- Total Carbohydrates: 34g
- Dietary Fiber: <1g
- Sugars: 18g
- Protein: 3g
How to Serve Vintage Spider-Man Cake
Serve the Vintage Spider-Man Cake at room temperature for the best flavor and texture. It pairs wonderfully with a glass of cold milk or a scoop of vanilla ice cream, enhancing the sweet experience. This cake is perfect for birthday parties, superhero-themed gatherings, or even just a fun afternoon treat with friends and family. Consider slicing it into larger pieces for sharing and enjoying!
How to Store Vintage Spider-Man Cake
Store any leftover cake in an airtight container at room temperature for up to 3 days. If you need to keep it longer, you can store it in the refrigerator for up to a week. Just make sure to bring it back to room temperature before serving to re-enjoy its fluffy goodness. For longer storage, consider wrapping slices in plastic wrap and freezing them for up to 3 months.
Expert Tips for Perfect Vintage Spider-Man Cake
- Make sure your butter is at room temperature to ensure better mixing and a fluffier cake.
- Don’t overmix the batter after adding the flour, as this could lead to a dense cake.
- Be mindful when dividing the batter; you want equal portions to get an even marble effect.
- You can use other food colorings or natural alternatives if desired.
- If you’re looking for variations, try adding chocolate chips or nuts for a twist!
Delicious Variations
Want to change things up? Here are some delightful variations of the Vintage Spider-Man Cake:
- Chocolate Spider-Man Cake: Substitute ½ cup of flour with unsweetened cocoa powder for a rich chocolate flavor.
- Vanilla Bean Variation: Use vanilla bean paste instead of vanilla extract for an extra depth of flavor.
- Fruit-Filled Layers: Add a layer of your favorite fruit preserves between the cake layers for a fruity surprise.
- Gluten-Free Option: Swap out the all-purpose flour for a gluten-free flour blend.
Frequently Asked Questions
Can I use cake mix instead of making it from scratch?
Yes! You can substitute your favorite vanilla or chocolate cake mix and follow the instructions on the box for a quicker version.Can I make this cake ahead of time?
Absolutely! You can bake the cake layers up to two days in advance and frost them on the day you plan to serve.What if I don’t have whole milk?
You can use any type of milk (like 2% or almond milk), and the cake will still turn out delicious. If you want to replicate whole milk’s richness, consider adding a splash of cream.How can I make this cake dairy-free?
Use dairy-free butter and a non-dairy milk alternative like almond or oat milk to make a dairy-free version of this cake.Is there a way to make this cake more visually appealing?
Definitely! Adding colorful sprinkles, edible glitter, or even chocolate spider decorations can give it an extra festive look.What’s a good frosting alternative?
If you’re looking for something different, try cream cheese frosting or whipped coconut cream for a lighter option.How do I achieve a more vibrant color?
Gel food colorings work best for achieving intense colors without altering the cake’s consistency.Can I use this recipe for cupcakes?
Yes, you can! Just reduce the baking time to about 18-20 minutes, and watch them closely.How can I ensure my cake layers are even?
Use a scale to measure your batter or pour it into the pans using a measuring cup for consistent layers.Can I skip the edible glitter?
Of course! The edible glitter adds a nice touch, but it’s optional. The cake will be just as delicious without it.
Conclusion
The Vintage Spider-Man Cake is a nostalgic, delightful treat that brings joy to both kids and adults alike. With its vibrant layers and rich buttercream frosting, there’s no doubt this cake will be the star of any celebration. So why not try your hand at baking this fantastic cake? Grab your ingredients, roll up your sleeves, and create something special. Don’t forget to share your baking journey with us; we’d love to hear how it turned out! Happy baking!
Vintage Spider-Man Cake
Ingredients
Method
- Preheat your oven to 350°F (175°C). Grease and flour a 6-inch round cake pan.
- In a mixing bowl, cream together the butter and sugar until light and fluffy, about 3-4 minutes.
- Add the eggs one at a time, beating well after each addition. Stir in the vanilla extract.
- In another bowl, combine the flour, baking powder, and salt.
- Gradually add this mixture to the wet ingredients, alternating with the milk.
- Divide the batter into two bowls. Tint one bowl with red food coloring and the other with blue.
- Pour the batters into the prepared cake pan in alternating spoonfuls to create a marble effect.
- Bake for 25-30 minutes or until a toothpick inserted in the center comes out clean.
- Let the cakes cool in the pan for 10 minutes, then turn them out onto wire racks to cool completely.
- Once cooled, slice each layer in half horizontally to create four layers total.
- Assemble your cake by layering and frosting each cake layer generously with buttercream.
- Decorate as desired, adding a Spider-Man cake topper and edible glitter.