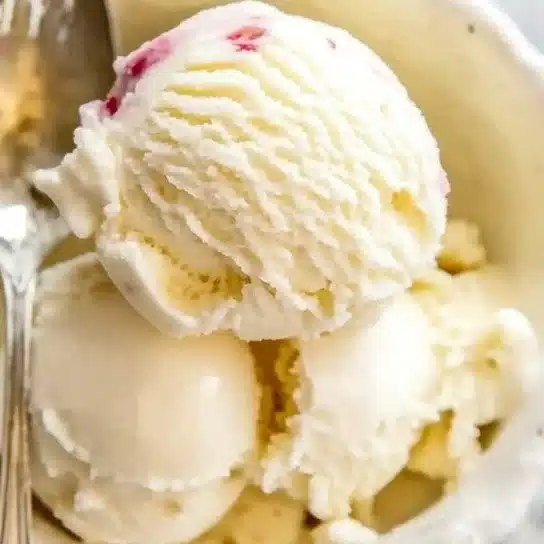
Vanilla ice cream is a classic dessert that evokes a sense of nostalgia and joy. Its creamy texture and aromatic sweetness make it a perennial favorite for all ages. Whether served in a cone, alongside a slice of pie, or enjoyed straight from the tub, homemade vanilla ice cream adds a touch of indulgence to any occasion. Learning to make this delightful treat at home is simpler than you might think, and the process is incredibly rewarding.
Why Make This Vanilla Ice Cream
Creating your own vanilla ice cream offers several benefits. First, you get to control the ingredients, ensuring the highest quality and freshness. With just a few simple components, you can whip up a treat that’s free from preservatives and artificial flavors. Furthermore, the joy of crafting this delicious dessert from scratch cannot be understated—there’s nothing quite like the smell of vanilla wafting through your kitchen! Plus, it’s an excellent way to impress friends and family with your culinary skills.
How to Make Vanilla Ice Cream
Making vanilla ice cream requires just a handful of steps, but the results are nothing short of spectacular. It starts with whisking together a rich mixture of cream, milk, and sugar, creating a base that is rich and creamy. When combined with pure vanilla extract, it becomes a dream dessert. The optional addition of egg yolks gives the ice cream a custardy depth, but even without them, the flavor remains outstanding. Here’s how to get started!
Ingredients:
- 2 cups heavy cream
- 1 cup whole milk
- 3/4 cup granulated sugar
- 1 tablespoon pure vanilla extract
- 1/4 teaspoon salt
- Optional: egg yolks
Directions:
- In a mixing bowl, whisk together the heavy cream, whole milk, sugar, vanilla extract, and salt until the sugar is dissolved.
- If using egg yolks, whisk them in a separate bowl and gradually temper them by adding a bit of the cream mixture. Then mix it all back together.
- Chill the mixture in the refrigerator for at least 2 hours—overnight is ideal for best flavors!
- Once chilled, pour the mixture into an ice cream maker and churn according to the manufacturer’s instructions.
- Transfer the mixture into a lidded container and freeze for at least 4 hours before indulging.
Nutritional Information
Per serving (1/2 cup):
- Calories: 250
- Total Fat: 17g
- Saturated Fat: 10g
- Cholesterol: 70mg
- Sodium: 50mg
- Total Carbohydrates: 24g
- Dietary Fiber: 0g
- Sugars: 23g
- Protein: 3g
How to Serve Vanilla Ice Cream
Vanilla ice cream is wonderfully versatile. Serve it in bowls or cones, and consider topping it with a drizzle of chocolate sauce, fresh berries, or a sprinkle of chopped nuts for added flavor and texture. It pairs beautifully with warm desserts like pie or cobbler and can be a delightful base for sundaes. For a more adult twist, you could add a splash of your favorite liqueur for an elegant dessert option.
How to Store Vanilla Ice Cream
To keep your vanilla ice cream fresh, store it in an airtight container in the freezer. Make sure to press a piece of plastic wrap directly onto the surface of the ice cream before sealing the lid to prevent ice crystals from forming. Properly stored, your homemade ice cream can last for about 2-3 weeks in the freezer, although it’s best enjoyed sooner rather than later!
Expert Tips for Perfect Vanilla Ice Cream
- For a smoother texture, chill your ice cream mixture thoroughly, ideally overnight.
- If you prefer a richer flavor, consider using a higher fat content cream.
- Churning the ice cream just until thickened is key—over-churning can lead to a grainy texture.
- Don’t forget to clean your ice cream maker according to the manufacturer’s instructions to avoid any lingering flavors from past batches.
Delicious Variations
Feel free to experiment with your vanilla ice cream recipe! Here are some delicious variations:
- Chocolate Chip Vanilla Ice Cream: Fold in mini chocolate chips just after churning.
- Mint Chocolate Chip: Add a few drops of peppermint extract instead of vanilla and mix in chocolate chips.
- Fruit Swirl: After churning, gently swirl in your favorite fruit preserves for a fruity twist.
Frequently Asked Questions
1. Can I make this recipe without an ice cream maker?
Yes, you can! Pour the chilled mixture into a shallow dish and freeze it. stir every 30 minutes until it reaches your desired consistency (about 3-4 hours).
2. How long does homemade vanilla ice cream last?
Properly stored in an airtight container, it can last 2-3 weeks in the freezer, although it’s best enjoyed fresh.
3. Can I use vanilla bean instead of extract?
Absolutely! Scrape the insides of a vanilla bean pod into the cream mixture for a more intense vanilla flavor and flecks of bean throughout your ice cream.
Conclusion
Making homemade vanilla ice cream is both simple and satisfying. With its creamy texture and delightful flavor, this classic treat can elevate any moment, whether you’re having a casual family dinner or hosting friends. So gather your ingredients, churn up some happiness, and enjoy the process. Don’t forget to share your ice cream experience with us—what flavor combinations do you love? Let your creativity run wild, and happy churning!
Vanilla Ice Cream
Ingredients
Method
- In a mixing bowl, whisk together the heavy cream, whole milk, sugar, vanilla extract, and salt until the sugar is dissolved.
- If using egg yolks, whisk them in a separate bowl and gradually temper them by adding a bit of the cream mixture. Then mix it all back together.
- Chill the mixture in the refrigerator for at least 120 minutes—overnight is ideal for best flavors.
- Once chilled, pour the mixture into an ice cream maker and churn according to the manufacturer's instructions.
- Transfer the mixture into a lidded container and freeze for at least 240 minutes before indulging.