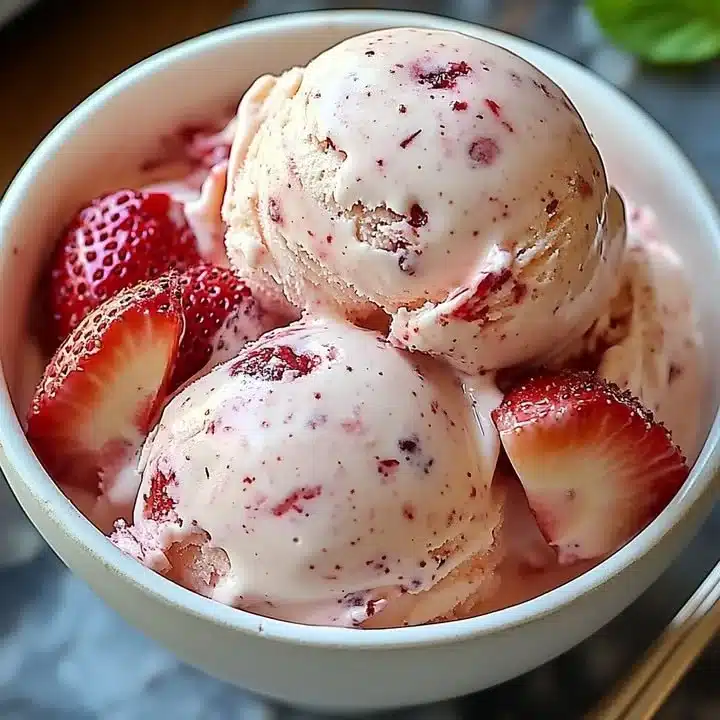
Why Make This Homemade Strawberry Vanilla Bean Ice Cream
There’s something truly special about homemade ice cream, especially when it combines fresh, juicy strawberries with the rich aroma of vanilla bean. This Homemade Strawberry Vanilla Bean Ice Cream recipe offers a delightful balance of flavors that is both refreshing and indulgent. Every bite brings the sweet, fruity essence of strawberries complemented by the creamy texture of rich ice cream. Unlike store-bought versions, you control the ingredients, ensuring it’s as natural and delicious as possible. Plus, making ice cream at home invites a wonderful sense of accomplishment.
How to Make Homemade Strawberry Vanilla Bean Ice Cream
Making your own strawberry vanilla bean ice cream might seem daunting, but it’s easier than you think! The process involves preparing a sweet strawberry mixture and then blending it with a rich and creamy custard base. You’ll whisk together egg yolks to create that classic ice cream texture, while the vanilla bean adds a touch of luxury. Each step builds upon the last, resulting in a treat that’s not just good but exceptional.
Ingredients:
- 2 cups fresh strawberries, hulled and sliced
- 1 cup granulated sugar
- 1 vanilla bean, split and seeds scraped
- 2 cups heavy cream
- 1 cup whole milk
- 6 large egg yolks
Directions:
Prepare the Strawberry Mixture: In a saucepan over medium heat, combine the sliced strawberries, granulated sugar, and the seeds from the split vanilla bean. Cook, stirring occasionally, until the strawberries soften and their juices are released, which takes about 5-7 minutes. Once done, remove from heat and let the mixture cool.
Make the Cream Base: In a separate saucepan, heat the heavy cream and whole milk over medium heat until it simmers, then remove from heat.
Whisk the Egg Yolks: In a bowl, whisk the egg yolks until smooth. Gradually add the warm cream mixture, whisking constantly to prevent the yolks from cooking.
Thicken the Mixture: Return the combined mixture to low heat. Cook while stirring gently until it thickens enough to coat the back of a spoon, about 5-10 minutes.
Strain and Cool: Strain the mixture into a clean bowl to remove any cooked bits. Allow it to cool to room temperature, then cover and refrigerate for at least 4 hours, or until it is completely chilled.
Churn the Ice Cream: Pour the chilled custard into an ice cream maker. In the last few minutes of churning, add the cooled strawberry mixture so it swirls through the ice cream for a beautiful ripple effect.
Freeze and Serve: Transfer the churned ice cream into an airtight container and freeze for 2-4 hours, or until firm. When you’re ready to enjoy, scoop and serve!
Nutritional Information
Per serving (1/2 cup):
- Calories: 320
- Total Fat: 23g
- Saturated Fat: 14g
- Cholesterol: 150mg
- Carbohydrates: 28g
- Sugars: 24g
- Protein: 4g
- Fiber: 0g
(Note: Nutritional values may vary based on portion size and specific ingredients used.)
How to Serve Homemade Strawberry Vanilla Bean Ice Cream
This ice cream is perfect on its own, but you can elevate your dessert experience further. Consider serving it in a crisp waffle cone or a chilled bowl topped with fresh strawberries or homemade whipped cream. For a special touch, drizzle some chocolate or caramel sauce over the ice cream, or mix in pieces of shortbread or cookie crumbles to add texture. It’s also a lovely addition to pies or tartlets, creating an elegant dessert for gatherings or special occasions.
How to Store Homemade Strawberry Vanilla Bean Ice Cream
To keep your homemade ice cream fresh, store it in an airtight container, layering a piece of parchment paper on the surface before sealing it tightly. This helps prevent ice crystals from forming. Typically, it will remain good in the freezer for about 2-3 weeks. However, it’s best enjoyed within the first week for the freshest taste and texture.
Expert Tips for Perfect Homemade Strawberry Vanilla Bean Ice Cream
- Choose the Right Strawberries: Use ripe, sweet strawberries for the best flavor. If fresh ones aren’t available, you can use frozen strawberries; just thaw and drain any excess moisture before using.
- Chill Everything: Ensure that your cream base is well chilled before churning. This will yield a smoother texture in the final product.
- The Right Tools: An ice cream maker is key for achieving that creamy, churned consistency. If you don’t have one, you can still make ice cream using a mixing method—just freeze the base in a container and stir every 30 minutes for the first 2-3 hours to break up ice crystals.
Delicious Variations
- Balsamic Strawberry Ice Cream: Add a tablespoon of balsamic vinegar to the strawberries while cooking for a tangy twist.
- Peach-Nectarine Ice Cream: Swap the strawberries with fresh peaches or nectarines for a summery change.
- Chocolate Chip Swirl: Fold in mini chocolate chips or chunks in the last few minutes of churning for a delightful contrast to the fruity flavor.
Frequently Asked Questions
- Can I use a different sweetener? Absolutely! Honey, maple syrup, or coconut sugar can be used as alternatives; just adjust the amount based on sweetness preference.
- What if I don’t have an ice cream maker? You can make ice cream without one! Pour the mixture into a shallow container and freeze. Stir every 30 minutes until creamy to break up ice crystals.
- How can I make it dairy-free? Substitute heavy cream and whole milk with coconut cream and almond milk for a dairy-free option, keeping the texture creamy and tasty.
Conclusion
Homemade Strawberry Vanilla Bean Ice Cream is a delightful treat that combines fresh, seasonal strawberries with creamy vanilla richness. It’s easy to make, allows for creative variations, and offers a refreshing dessert option for warm days or any occasion. Gather your ingredients, get your ice cream maker ready, and indulge in the joy of creating something special in your own kitchen. Give this recipe a try, and share your results! We’d love to hear about the deliciousness you create!

Strawberry Vanilla Bean Ice Cream
Ingredients
Method
- In a saucepan over medium heat, combine the sliced strawberries, granulated sugar, and the seeds from the split vanilla bean. Cook, stirring occasionally, until the strawberries soften and their juices are released, about 5-7 minutes. Remove from heat and let the mixture cool.
- In a separate saucepan, heat the heavy cream and whole milk over medium heat until it simmers, then remove from heat.
- In a bowl, whisk the egg yolks until smooth. Gradually add the warm cream mixture, whisking constantly to prevent the yolks from cooking.
- Return the combined mixture to low heat. Cook while stirring gently until it thickens enough to coat the back of a spoon, about 5-10 minutes.
- Strain the mixture into a clean bowl to remove any cooked bits. Allow it to cool to room temperature, then cover and refrigerate for at least 4 hours, or until it is completely chilled.
- Pour the chilled custard into an ice cream maker. In the last few minutes of churning, add the cooled strawberry mixture to create a beautiful ripple effect.
- Transfer the churned ice cream into an airtight container and freeze for 2-4 hours, or until firm. When ready to enjoy, scoop and serve.