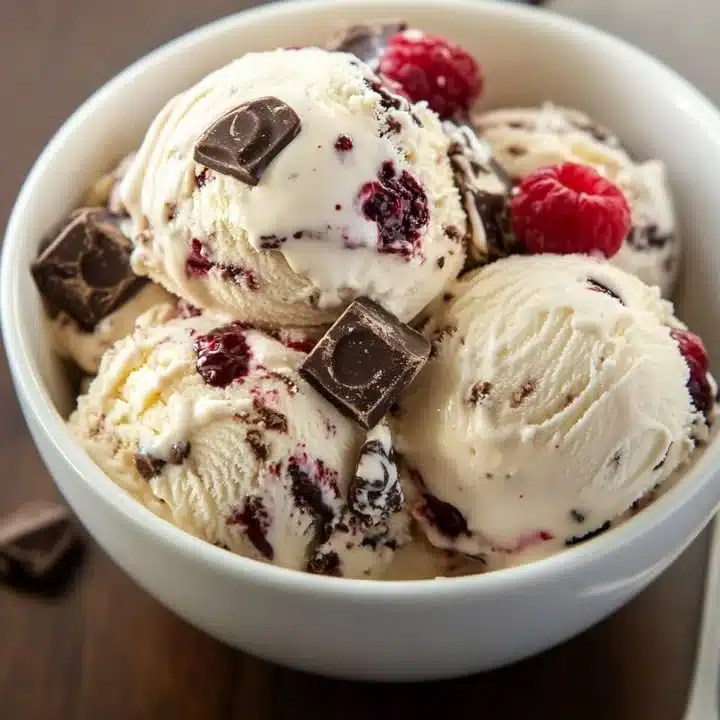
Cherry Garcia Ice Cream is a delightful treat that combines the sweetness of fresh cherries with the rich, creamy texture of homemade ice cream. Inspired by the iconic flavor created by Ben & Jerry’s, this version allows you to enjoy it in the comfort of your home. Making Cherry Garcia Ice Cream is not only a fun project but also a delicious reward on warm days, perfect for sharing with family and friends!
Why Make This Cherry Garcia Ice Cream
There are countless reasons to whip up a batch of Cherry Garcia Ice Cream at home. First, it’s incredibly easy to make and doesn’t require any complicated techniques or hard-to-find ingredients. The process is fun, especially for kids, who will love helping out in the kitchen! Plus, you can customize it to suit your taste. The burst of fresh cherries paired with the smooth richness of cream and the crunch of dark chocolate chips creates a delightful explosion of flavors and textures. You control the sweetness, making it as indulgent or as light as you wish.
How to Make Cherry Garcia Ice Cream
Making Cherry Garcia Ice Cream is straightforward and satisfying. You simply mix together a few staple ingredients, churn them in an ice cream maker, and freeze until firm. The whole process takes just a little time, but the payoff is a creamy, dreamy dessert that everyone will adore.
Ingredients:
- 2 cups heavy cream
- 1 cup whole milk
- 3/4 cup sugar
- 1 teaspoon vanilla extract
- 1 cup fresh cherries, pitted and chopped
- 1/2 cup dark chocolate chips
Directions:
- In a mixing bowl, combine the heavy cream, whole milk, sugar, and vanilla extract. Whisk until the sugar is dissolved.
- Pour the mixture into an ice cream maker and churn according to the manufacturer’s instructions until it reaches a soft-serve consistency.
- Stir in the chopped cherries and dark chocolate chips.
- Transfer the mixture to a lidded container and freeze for at least 4 hours or until firm.
- Scoop, serve, and enjoy your homemade Cherry Garcia Ice Cream!
Nutritional Information
- Calories: 290 per serving (1/2 cup)
- Fat: 18g
- Saturated Fat: 11g
- Carbohydrates: 28g
- Sugars: 23g
- Protein: 3g
- Fiber: 1g
Nutritional values vary based on exact ingredient choices and serving size.
How to Serve Cherry Garcia Ice Cream
Cherry Garcia Ice Cream can be served in multitude of ways! Scoop it into cones for a classic treat, or serve it in bowls topped with a sprig of fresh mint for a pop of color. You can also use it as a delicious filling between two cookies for a homemade ice cream sandwich. Pair it with a drizzle of chocolate sauce or sprinkle some additional cherries on top for an extra special dessert.
How to Store Cherry Garcia Ice Cream
To keep your Cherry Garcia Ice Cream fresh, store it in an airtight container in the freezer. This will keep it from absorbing any unwanted flavors. The ice cream will stay good for about 2-3 weeks, but it’s best enjoyed within the first week for the freshest taste and texture.
Expert Tips for Perfect Cherry Garcia Ice Cream
- Make sure to pit and chop your cherries evenly to distribute their flavor throughout the ice cream.
- If you don’t have an ice cream maker, you can freeze the mixture in a shallow dish and stir it every 30 minutes for about 3 hours.
- For a slightly healthier version, swap out the heavy cream for half and half, though this will alter the creaminess.
- Experiment with different types of chocolate chips such as white chocolate or even milk chocolate for a sweet twist.
Delicious Variations
- Berry Blitz: Replace cherries with mixed berries like strawberries, blueberries, and raspberries.
- Nutty Cherry Delight: Add a handful of toasted almonds or walnuts to give it a crunchy texture.
- Mint Chocolate Cherry: Incorporate a few drops of peppermint extract for a refreshing minty flavor.
Frequently Asked Questions
Can I make Cherry Garcia Ice Cream without an ice cream maker?
Yes! You can freeze the mixture in a shallow dish and stir it every 30 minutes until it reaches the desired consistency.How do I know when my ice cream is ready?
You’ll know your ice cream is ready when it has a soft-serve consistency while churning. After transferring it to a container and freezing, it should reach a firm texture in about 4 hours.Can I use frozen cherries instead of fresh?
Absolutely! Just ensure you thaw and drain excess moisture from the frozen cherries before mixing them in.
Conclusion
Making Cherry Garcia Ice Cream at home is not only a rewarding experience but also an opportunity to enjoy a timeless classic with a personal touch. The sweet cherries and rich chocolate in creamy vanilla ice cream make for an irresistible treat that everyone will love. So why not take some time to make this delightful dessert? Your taste buds will thank you, and you might find yourself becoming the favorite dessert-maker among friends and family! Enjoy the process, and don’t hesitate to share your creations!

Cherry Garcia Ice Cream
Ingredients
Method
- In a mixing bowl, combine the heavy cream, whole milk, sugar, and vanilla extract. Whisk until the sugar is dissolved.
- Pour the mixture into an ice cream maker and churn according to the manufacturer's instructions until it reaches a soft-serve consistency.
- Stir in the chopped cherries and dark chocolate chips.
- Transfer the mixture to a lidded container and freeze for at least 4 hours or until firm.
- Scoop, serve, and enjoy your homemade Cherry Garcia Ice Cream!