Imagine a dessert that combines the warm, spiced flavor of caramelized cookies with the smooth, velvety texture of a premium cheesecake. This no-bake Biscoff cheesecake is a true dream for anyone who loves cookie butter. You do not even need to turn on your oven to make this showstopper. It looks elegant, tastes incredible, and feels like a professional treat from a high-end bakery. Every bite melts in your mouth, offering a perfect balance of crunchy biscuit base and fluffy, creamy filling. Whether you are hosting a dinner party or just want to treat your family, this recipe is guaranteed to be a hit.
Why Make This biscoff cheesecake no bake
This recipe is a game-changer for several reasons. First, it is incredibly easy to put together. Since it is a no-bake recipe, you do not have to worry about water baths, oven temperatures, or the dreaded cracks on top of your cheesecake. It is practically foolproof. Second, the flavor is unique. Biscoff spread has a distinct deep caramel and cinnamon profile that pairs beautifully with tangy cream cheese. Third, it is a great time-saver. You can whip it up in the morning or the night before, letting the refrigerator do all the hard work. Finally, the texture is sublime—it is light, airy, and rich all at the same time.
How to Make biscoff cheesecake no bake
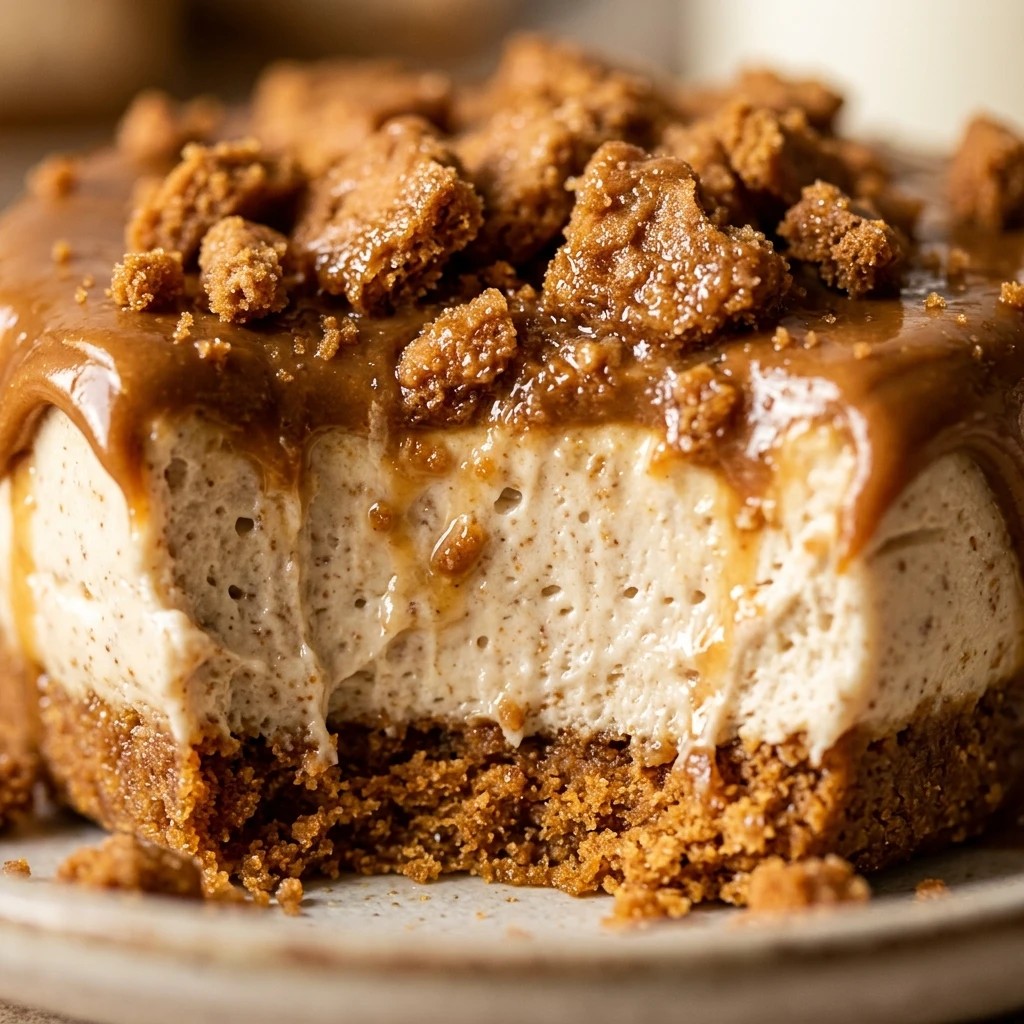
Making this cheesecake involves three simple stages: creating the crust, preparing the filling, and letting it set. You start by crushing spiced biscuits into fine crumbs and mixing them with melted butter to create a sturdy, flavorful base. Next, you beat the cream cheese and cookie butter together until they are perfectly smooth. The secret to the fluffy texture is folding in stiffly whipped cream, which gives the cheesecake its height and lightness without needing gelatin. Once the filling is poured over the base, it just needs a few hours in the cold to become firm and sliceable. It is a straightforward process that yields a very professional result.
Ingredients
- 250 grams Lotus Biscoff biscuits: These provide the iconic spiced flavor for the base.
- 80 grams unsalted butter: Melted to bind the biscuit crumbs together.
- 500 grams full-fat cream cheese: Make sure it is at room temperature for a smooth texture.
- 250 grams Biscoff spread (creamy): This goes into the filling and serves as a delicious topping.
- 100 grams powdered sugar: Also known as icing sugar, this sweetens the filling without adding grit.
- 1 teaspoon vanilla extract: Enhances the warm notes of the caramel and spices.
- 300 milliliters heavy whipping cream: Must be very cold to whip up properly and provide structure.
- Extra Biscoff biscuits: For decorating the top.
Directions
- Prepare the Base: Place the Biscoff biscuits into a food processor and pulse until they become fine crumbs. Alternatively, put them in a zip-top bag and crush them with a rolling pin.
- Mix the Crust: Transfer the crumbs to a bowl and pour in the melted butter. Stir until the mixture looks like wet sand.
- Press the Crust: Pour the buttery crumbs into an 8-inch (20cm) springform pan. Press down firmly using the back of a spoon or a flat-bottomed glass to create an even layer. Place the pan in the fridge to chill while you make the filling.
- Cream the Cheese: In a large mixing bowl, beat the softened cream cheese, powdered sugar, and 200 grams of the Biscoff spread together using a hand mixer or stand mixer. Continue until the mixture is smooth and no lumps remain. Stir in the vanilla extract.
- Whip the Cream: In a separate chilled bowl, beat the heavy whipping cream until stiff peaks form. Be careful not to overbeat it into butter.
- Combine: Gently fold the whipped cream into the cream cheese mixture using a spatula. Use slow, sweeping motions to keep the air in the filling.
- Fill the Pan: Spread the filling over the chilled biscuit base. Use a spatula to smooth out the top until it is level.
- Chill: Cover the pan with plastic wrap and refrigerate for at least 6 hours, or ideally overnight, until the cheesecake is firm.
- Decorate: Once set, melt the remaining 50 grams of Biscoff spread in the microwave for 20 seconds. Drizzle it over the top of the cheesecake. Add extra crushed biscuits or whole biscuits around the edges for a beautiful finish.
Nutritional Information
This nutritional information is an estimate based on one serving (assuming the cake is cut into 12 slices).
- Calories: 485 kcal
- Total Fat: 36g
- Saturated Fat: 21g
- Cholesterol: 85mg
- Sodium: 310mg
- Total Carbohydrates: 38g
- Dietary Fiber: 0.5g
- Sugars: 26g
- Protein: 5g
- Vitamin D: 2% DV
- Calcium: 8% DV
- Iron: 4% DV
How to Serve biscoff cheesecake no bake
This cheesecake is best served straight from the refrigerator. To get clean, professional-looking slices, use a sharp knife dipped in hot water and wiped dry between each cut. This prevents the filling from sticking to the blade. It is a rich dessert, so small slices are often enough. For a special occasion, serve each slice with a dollop of extra whipped cream or a fresh strawberry on the side to balance the sweetness. It pairs wonderfully with a cup of hot coffee or a glass of cold milk.
How to Store biscoff cheesecake no bake
Store any leftover cheesecake in the refrigerator. Keep it in an airtight container or cover the springform pan tightly with plastic wrap to prevent it from absorbing other fridge odors. It will stay fresh and delicious for up to 3 to 4 days. If you want to keep it longer, you can freeze this cheesecake. Wrap individual slices in plastic wrap and then foil. They can be frozen for up to 2 months. To eat, simply thaw a slice in the refrigerator for a few hours before serving.
Expert Tips for Perfect biscoff cheesecake no bake
- Use Full-Fat Ingredients: For a no-bake cheesecake, the fat content is what helps it set. Do not use low-fat cream cheese or light whipped toppings, as the cake may turn out runny.
- Room Temperature Cheese: Make sure your cream cheese is truly soft before mixing. If it is cold, you will end up with tiny white lumps in your beautiful brown Biscoff filling.
- Cold Cream: Unlike the cheese, your heavy cream should be very cold. Cold cream whips faster and holds its shape much better.
- Firm Base: Really press those crumbs down into the pan. If the base is loose, it will crumble and fall apart when you try to serve the slices.
- Patience is Key: Do not try to rush the chilling process. It needs at least 6 hours to set properly. If you cut it too early, the center might still be soft.
Delicious Variations
While the classic version is amazing, you can try these fun twists:
- Chocolate Biscoff: Add 100 grams of melted (and slightly cooled) dark chocolate to the filling for a mocha-like flavor.
- White Chocolate Swirl: Drizzle melted white chocolate over the top along with the Biscoff spread for a beautiful marbled look.
- Crunchy Version: Use the “Crunchy” Biscoff spread instead of the smooth one to add little bits of biscuit throughout the filling.
- Individual Jars: Instead of a large pan, layer the crumbs and filling into small glass jars for adorable single-serving desserts.
- Salted Caramel: Add a tiny pinch of sea salt to the filling to enhance the caramel notes of the Biscoff biscuits.
Frequently Asked Questions
1. Can I use a different type of biscuit for the base?
Yes, you can use graham crackers or digestive biscuits, but you will lose that specific Biscoff flavor in the crust. If you do use them, consider adding a teaspoon of cinnamon to the crumbs.
2. Why did my cheesecake not set?
This usually happens if the cream wasn’t whipped to stiff peaks or if you used low-fat cream cheese. Make sure everything is full-fat and the cream is very thick before folding it in.
3. Can I use a blender instead of a food processor?
Yes, a blender works well to crush the biscuits. Just pulse them in short bursts so they don’t turn into a greasy paste.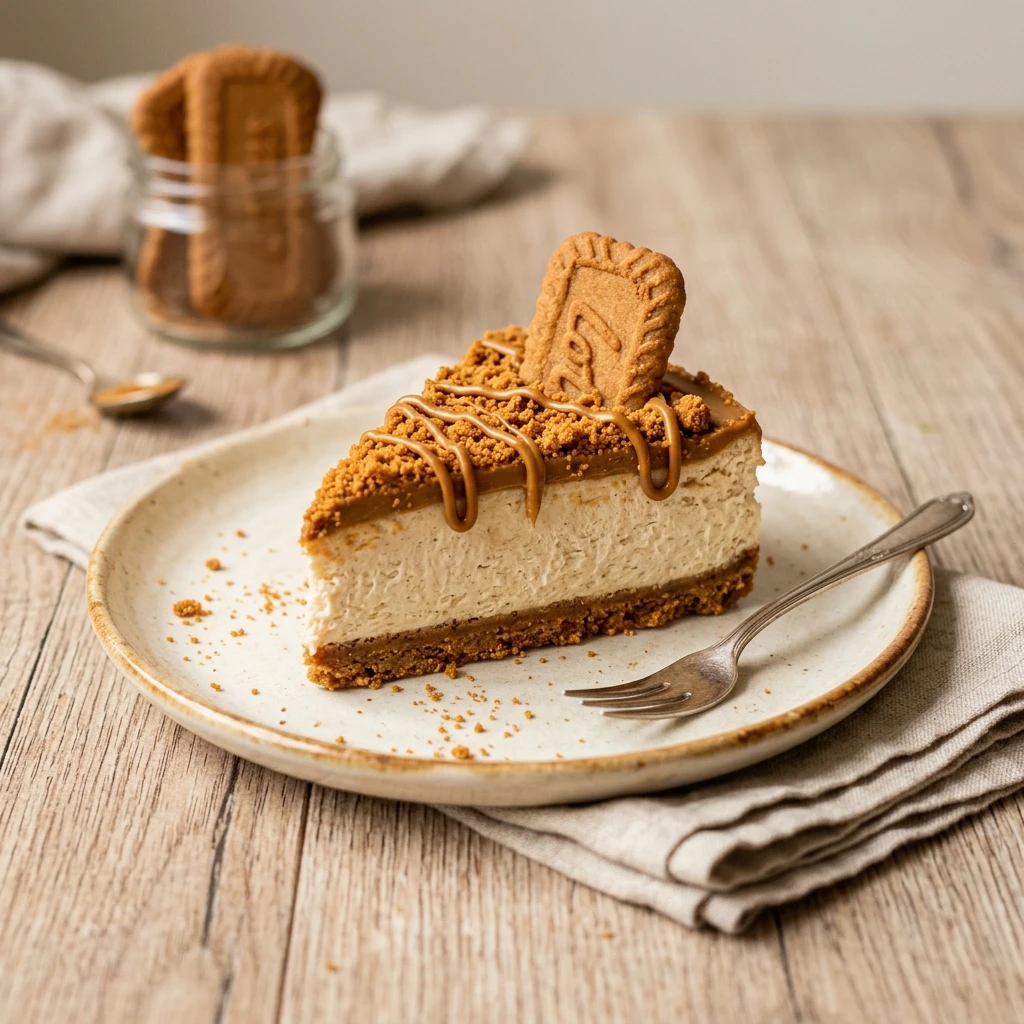
4. Is there a substitute for Biscoff spread?
Any brand of “Speculoos” or “Cookie Butter” spread will work perfectly in this recipe.
5. Do I need to grease the pan?
It isn’t strictly necessary for the bottom, but lightly greasing the sides of the springform pan can help the cheesecake release more cleanly.
6. Can I make this a few days in advance?
Yes, it actually tastes better after sitting for 24 hours as the flavors have more time to meld together.
7. How do I get the cheesecake off the bottom of the pan?
If you want to move it to a cake stand, line the bottom of the pan with parchment paper before pressing in the crumbs. You can then slide it off the metal base onto your plate.
8. Can I use whipped topping from a tub?
It is better to use real heavy whipping cream for the best flavor and stability, but a stabilized whipped topping can work in a pinch.
9. My filling is too thick to fold, what should I do?
Ensure your cream cheese mixture isn’t too cold. If it’s very stiff, stir in a small amount of the whipped cream vigorously to lighten it up before gently folding in the rest.
10. Can I add fruit to this?
Biscoff pairs surprisingly well with sliced bananas or even a few tart raspberries on top to cut through the richness.
Conclusion
This no-bake Biscoff cheesecake is the ultimate treat for any dessert lover. With its crunchy spiced base and its cloud-like cookie butter filling, it offers a sophisticated flavor profile that is surprisingly easy to achieve at home. It is the perfect recipe for those who want a high-impact dessert without the stress of baking. Give this recipe a try for your next family gathering or weekend treat. Once you taste that unique caramelized flavor, you will understand why Biscoff is loved all over the world. Don’t forget to share a photo of your beautiful creation and let us know how much you enjoyed it!
Biscoff Cheesecake
Ingredients
Method
- Place the Biscoff biscuits into a food processor and pulse until fine crumbs form.
- Transfer the crumbs to a bowl and pour in the melted butter. Stir until the mixture looks like wet sand.
- Pour the buttery crumbs into an 8-inch springform pan and press down firmly to create an even layer.
- Place the pan in the fridge to chill.
- In a large mixing bowl, beat the softened cream cheese, powdered sugar, and 200 grams of Biscoff spread until smooth.
- Stir in the vanilla extract.
- In a separate bowl, whip the heavy cream until stiff peaks form.
- Gently fold the whipped cream into the cream cheese mixture using a spatula.
- Spread the filling over the chilled biscuit base, smoothing the top with a spatula.
- Cover with plastic wrap and refrigerate for at least 6 hours or overnight until firm.
- Once set, drizzle melted Biscoff spread over the top and decorate with extra biscuits.