Why Make This Pita Bread
Pita bread is a delightful staple in many cuisines around the world. Its light, fluffy texture and versatile nature make it perfect for scooping, wrapping, or filling with your favorite ingredients. Making pita bread at home can be a satisfying experience, allowing you to enjoy warm, fresh bread just the way you like it. Plus, it’s a simple recipe that requires minimal ingredients, making it an ideal choice for both beginners and seasoned bakers.
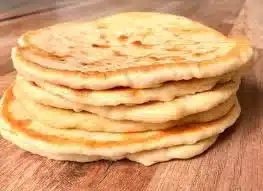
How to Make Pita Bread
Creating your own pita bread at home is straightforward and rewarding. By combining basic pantry ingredients, you can produce soft, pillowy pita that’s perfect for dips, sandwiches, or just enjoying fresh out of the oven. The process involves mixing and kneading the dough, letting it rise, and then baking it at a high temperature to achieve that classic pocket that we all love.
Ingredients:
- 2 cups all-purpose flour
- 1 teaspoon salt
- 1 teaspoon sugar
- 1 packet (2 1/4 teaspoons) active dry yeast
- 3/4 cup warm water
- 1 tablespoon olive oil
Directions:
- In a small bowl, dissolve the sugar in warm water and then sprinkle the yeast on top. Let it sit for about 5-10 minutes until frothy.
- In a large mixing bowl, combine the flour and salt.
- Add the yeast mixture and olive oil to the flour and mix until a dough forms.
- Knead the dough on a floured surface for about 5-7 minutes until smooth.
- Place the dough in a greased bowl, cover it, and let it rise in a warm place for about 1 hour, or until it doubles in size.
- Preheat the oven to 475°F (245°C) and place a baking stone or tray inside.
- Punch down the dough, divide it into small balls, and roll each ball into a flat circle about 1/4 inch thick.
- Place the rolled dough onto the hot baking surface and bake for 3-5 minutes until puffed and lightly golden.
- Remove and let cool before serving.
Nutritional Information
Per serving (1 pita):
- Calories: 130
- Total Fat: 2g
- Saturated Fat: 0g
- Carbohydrates: 25g
- Dietary Fiber: 1g
- Sugars: 0g
- Protein: 4g
This homemade pita is not only delicious but also relatively low in calories, making it a great addition to any meal.
How to Serve Pita Bread
Pita bread can be served in a variety of ways. Use it for dipping into hummus or tzatziki, or cut it into wedges and serve it with a fresh salad. Fill it with grilled meats and veggies for a tasty sandwich, or create a Mediterranean-style wrap with falafel and fresh vegetables. The options are endless!
How to Store Pita Bread
Once cooled, store your pita bread in an airtight container at room temperature for up to 3 days. If you want to keep it longer, you can freeze it. Wrap each pita in plastic wrap and place them in a freezer bag. They should stay fresh for about 2-3 months. You can reheat them in the oven or a toaster for a few minutes before serving.
Expert Tips for Perfect Pita Bread
- Make sure your water is warm, not hot, to help the yeast activate without killing it.
- Knead the dough thoroughly to develop the gluten, which gives the bread its structure.
- Adjust the baking time based on your oven; every oven behaves a bit differently.
- For softer pita, cover them with a clean towel right after baking to keep moisture in.
Delicious Variations
- Whole Wheat Pita: Substitute half or all of the all-purpose flour with whole wheat flour for a nuttier flavor and added nutrition.
- Herbed Pita: Mix in herbs like dried oregano or rosemary into the dough for added flavor.
- Stuffed Pita: Before baking, fill each circle with cheese, cooked meats, or vegetables and fold them over to create a stuffed pocket.
Frequently Asked Questions
1. Can I use instant yeast instead of active dry yeast?
Yes! Instant yeast can be used in place of active dry yeast without needing to dissolve it first. Just mix it directly with the flour.
2. Why did my pitas not puff up?
If your pitas don’t puff, the dough may not have risen properly, or they may have been too thick when rolled. Ensure the dough rises well and roll them evenly to about 1/4 inch thick.
3. How can I make gluten-free pita bread?
To make gluten-free pita, use a gluten-free flour blend and adjust the liquid as necessary to achieve the right dough consistency. Also, consider adding a binding agent like xanthan gum.
Conclusion
Making homemade pita bread is a delightful and satisfying experience that brings warmth and deliciousness to your kitchen. With this easy recipe, you can create fresh pita that is perfect for any occasion, from casual snacking to festive gatherings. So roll up your sleeves, gather your ingredients, and give it a try! Your taste buds will thank you, and you may never want to buy store-bought pita again! Enjoy your baking and feel free to share your experiences in the comments!