Here’s a delightful article about how to make Homemade Cherry Ice Cream, capturing all your specifications as requested:
Why Make This Homemade Cherry Ice Cream
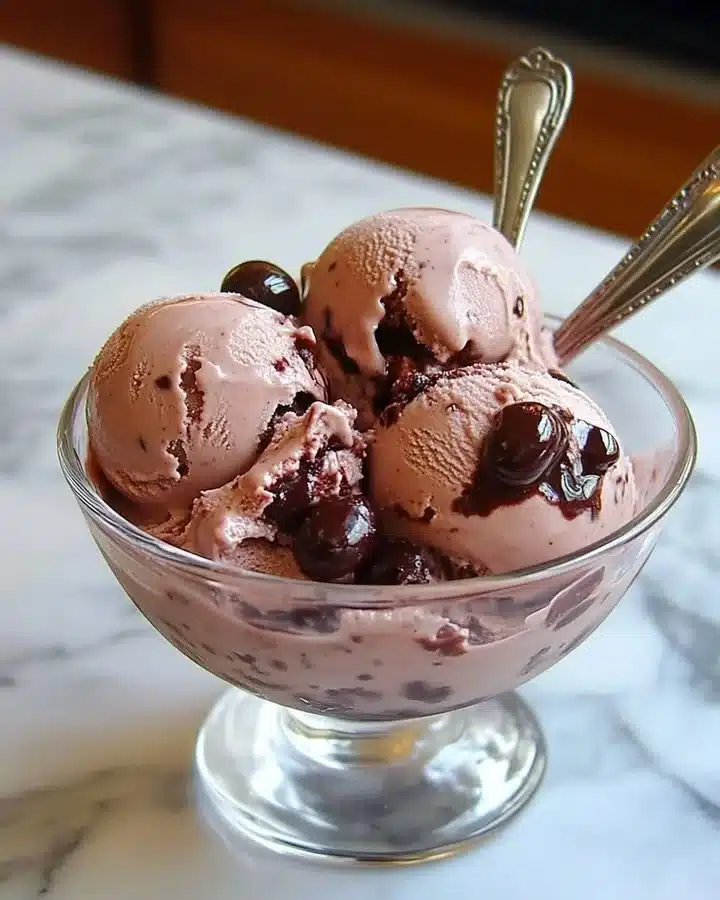
Homemade Cherry Ice Cream is not just a treat; it’s an experience that takes you back to warm summer days filled with laughter and joy. The vibrant color of ripe cherries combined with the rich creaminess of ice cream creates a delightful dessert that is both satisfying and refreshing. With every scoop, you’ll taste the natural sweetness of the cherries, balanced perfectly with the smoothness of cream and a touch of vanilla. Plus, making it from scratch means you’ve got total control over the ingredients, ensuring that what you serve is as fresh and wholesome as can be.
How to Make Homemade Cherry Ice Cream
Making your own cherry ice cream is surprisingly simple and requires just a few easy steps. You don’t need to be a professional chef to whip up this creamy delight. The process involves macerating the cherries to enhance their flavor, mixing together the cream base, and then churning it in an ice cream maker. The result? A luscious treat that is sure to impress family and friends!
Ingredients:
- 2 cups cherries, pitted and halved
- 1 cup heavy cream
- 1 cup whole milk
- 3/4 cup granulated sugar
- 1 teaspoon vanilla extract
- Pinch of salt
Directions:
- Start by tossing the pitted and halved cherries into a medium bowl with 1/4 cup of sugar. Let them sit for about 30 minutes to macerate. This step really brings out their natural sweetness and flavor!
- In a separate bowl, whisk together the heavy cream, whole milk, the remaining sugar, vanilla extract, and a pinch of salt until the sugar is fully dissolved.
- Once your cherry mixture is ready, fold it into the cream mixture and stir until fully combined.
- Now it’s time to churn! Pour this delightful mixture into your ice cream maker and churn according to the manufacturer’s instructions until you get a soft-serve consistency.
- Transfer your luscious ice cream into a lidded container and pop it in the freezer for at least 4 hours, or until it’s firm enough to scoop.
- Serve up your homemade cherry ice cream in a bowl or cone, and enjoy the sweet, creamy goodness!
Nutritional Information
Per serving (1/2 cup):
- Calories: 240
- Total Fat: 14g
- Saturated Fat: 8g
- Cholesterol: 45mg
- Sodium: 30mg
- Total Carbohydrates: 27g
- Dietary Fiber: 1g
- Sugars: 22g
- Protein: 3g
How to Serve Homemade Cherry Ice Cream
Serve your homemade cherry ice cream in classic waffle cones, sugar cones, or bowls, depending on your mood. For a touch of elegance, drizzle some chocolate syrup or serve a scoop atop a slice of warm pie. You might also sprinkle some chopped nuts or fresh cherries for extra flair. This ice cream is perfect for summer picnics, birthday parties, or as a comforting dessert after dinner.
How to Store Homemade Cherry Ice Cream
To store your cherry ice cream, transfer it into an airtight container and place it in the freezer. It will keep well for about 2-3 weeks. For best results, try to avoid leaving it out at room temperature for extended periods, as it may start to melt and become icy when refrozen.
Expert Tips for Perfect Homemade Cherry Ice Cream
- To enhance the flavor, consider adding a splash of almond extract along with the vanilla.
- If you prefer a smoother texture, blend the cherry mixture before folding it into the cream.
- Don’t rush the maceration step! Leaving the cherries to soak in sugar allows them to release their juices and intensify their flavor.
- Ensure your ice cream maker bowl is fully chilled before starting the churning process for the best texture.
Delicious Variations
- Berry Blend: Swap cherries for a mix of your favorite berries like strawberries, blueberries, and raspberries for a berry blast.
- Chocolate Cherry: Add chocolate chips to the mixture for a delightful chocolate-cherry combo.
- Cherry Almond: Include crushed almonds for a crunchy texture and a nutty flavor.
- Coconut Cherry: Substitute 1 cup of heavy cream with coconut cream for a tropical twist.
Frequently Asked Questions
Can I use frozen cherries?
Yes, you can use frozen cherries, but make sure to let them thaw and drain any excess liquid for the best results.Do I need an ice cream maker?
While an ice cream maker yields the creamiest texture, you can also make this without one! Pour the mixture into a shallow dish, freeze, and stir every 30 minutes until it reaches the desired consistency.How can I make it dairy-free?
Substitute whole milk and heavy cream with coconut milk or almond milk, and use a dairy-free alternative for sugar if necessary.
Conclusion
Homemade Cherry Ice Cream is a delightful treat that anyone can make with just a few simple ingredients. The burst of cherry flavor combined with the creamy base makes it a favorite for all ages. So why not gather your cherries and get started? You’ll impress your loved ones with this deliciously sweet dessert, and who knows, it may become a new family tradition. Give it a try, and let me know how your homemade cherry ice cream turns out!
Homemade Cherry Ice Cream
Ingredients
Method
- Toss the pitted and halved cherries with 1/4 cup of sugar in a medium bowl and let them macerate for about 30 minutes.
- In a separate bowl, whisk together heavy cream, whole milk, the remaining sugar, vanilla extract, and a pinch of salt until the sugar is fully dissolved.
- Fold the cherry mixture into the cream mixture and stir until fully combined.
- Pour the mixture into your ice cream maker and churn according to the manufacturer's instructions until you achieve a soft-serve consistency.
- Transfer the ice cream to a lidded container and freeze for at least 4 hours until firm.
- Serve the homemade cherry ice cream in bowls or cones, and enjoy!