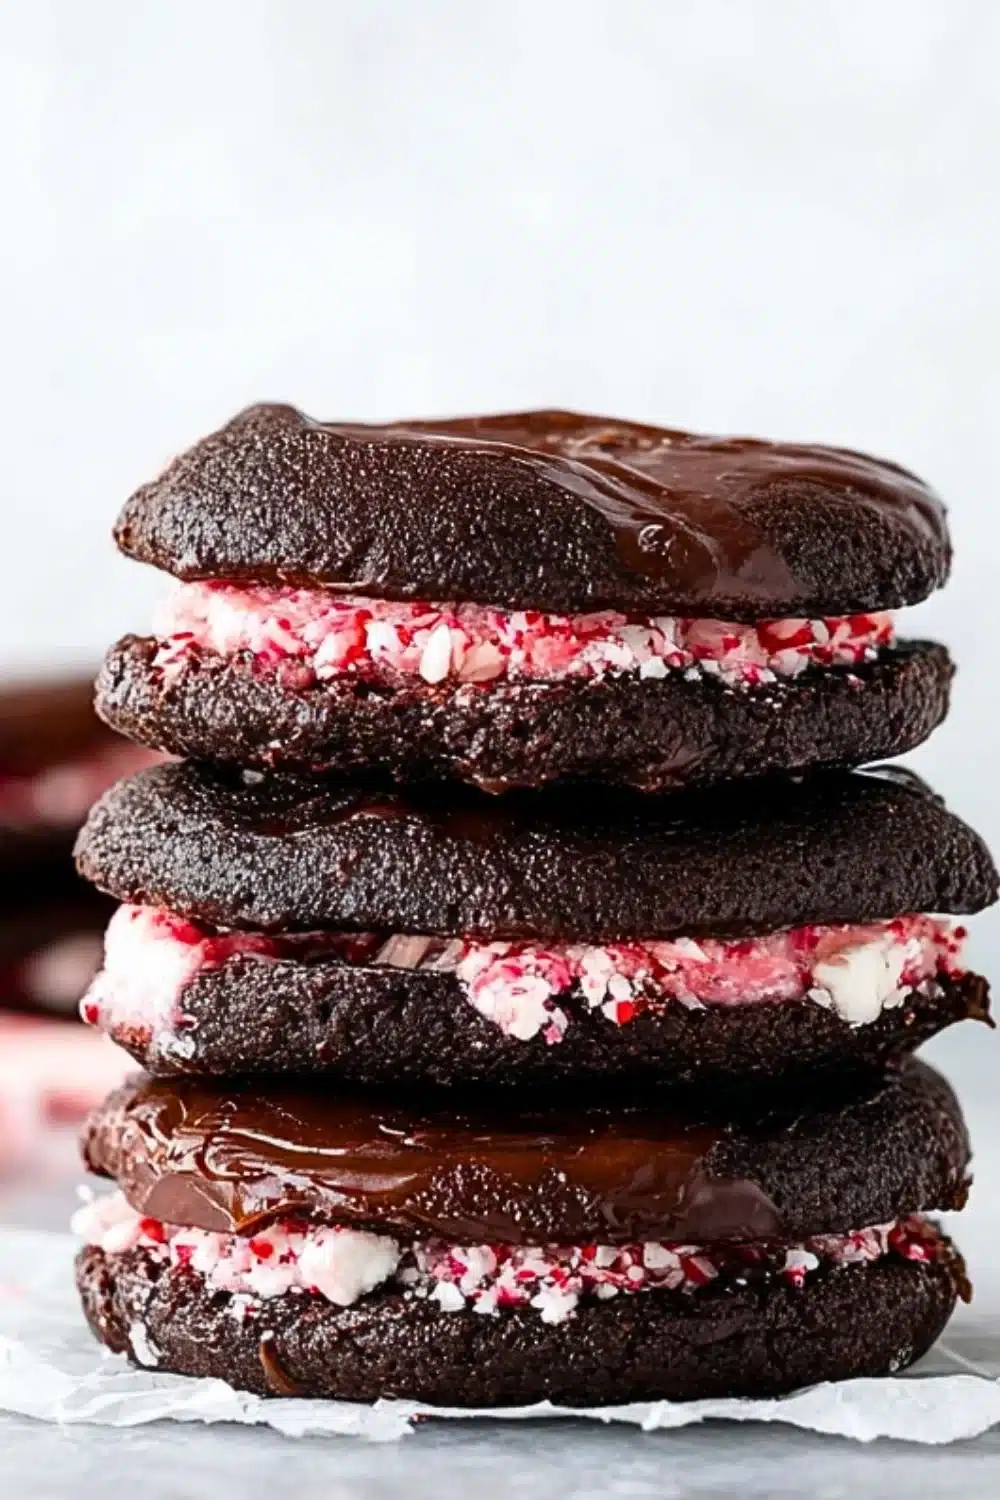
Why Make This Chocolate Peppermint Sandwich Cookies
These Chocolate Peppermint Sandwich Cookies bring together the rich, decadent flavors of chocolate and the refreshing bite of peppermint. Perfect for the holiday season, they also make delightful treats year-round. The cookies are soft and chewy, while the creamy peppermint filling adds a wonderful contrast. With a touch of crushed candy canes on the edges for a festive crunch, these cookies not only taste amazing but also look beautiful on any dessert table. Plus, the process of making these cookies is simple and fun, making them a great baking activity with family and friends.
How to Make Chocolate Peppermint Sandwich Cookies
Making Chocolate Peppermint Sandwich Cookies is easier than you might think! Start by creaming the butter and sugars together until light and fluffy, which creates a base for your cookies that’s rich and flavorful. Next, incorporate eggs and vanilla extract to enrich the batter. While the wet ingredients come together, whisk the dry ingredients separately. This ensures even mixing and great texture. Once combined, chill the dough to help the flavors meld together and make the cookies easier to handle.
After chilling, simply scoop and bake. The warm, chocolate aroma wafting through your kitchen will be irresistible! Once the cookies are cool, it’s time to whip up the peppermint frosting. With just a few ingredients, you’ll have a creamy filling ready to sandwich between your cookies. Rolling them in crushed candy canes adds a festive touch, making these cookies perfect for sharing during the holiday season or any special occasion.
Ingredients:
- 1 cup unsalted butter, softened
- 1 cup granulated sugar
- 0.5 cup packed light brown sugar
- 2 large eggs
- 2 teaspoons vanilla extract
- 1.75 cups all-purpose flour
- 0.75 cup unsweetened cocoa powder
- 1 teaspoon baking soda
- 0.5 teaspoon baking powder
- 0.5 teaspoon salt
- 1 cup semi-sweet or dark chocolate chips
- 0.5 cup unsalted butter, softened (for frosting)
- 2 cups powdered sugar
- 2 tablespoons heavy cream or milk
- 0.5 teaspoon peppermint extract
- Red food coloring (optional)
- Crushed candy canes (for rolling edges)
Directions:
- Cream the softened unsalted butter, granulated sugar, and brown sugar together until light and fluffy.
- Beat in the eggs one at a time, then add the vanilla extract.
- In a separate bowl, whisk together the all-purpose flour, cocoa powder, baking soda, baking powder, and salt.
- Gradually add the dry ingredients to the wet mixture until just combined. Stir in the chocolate chips.
- Chill the dough in the refrigerator for 30–60 minutes.
- Preheat the oven to 350°F (175°C) and line baking sheets with parchment paper. Scoop dough and place on sheets two inches apart.
- Bake for 9–11 minutes, until edges are set. Cool completely on wire racks.
- For the frosting, beat the butter until creamy, then add powdered sugar, heavy cream or milk, and peppermint extract. Optionally, tint with red food coloring for a festive look.
- Spread or pipe frosting onto the flat side of one cookie, sandwich it with another, and roll the edges in crushed candy canes.
- Refrigerate for 15–20 minutes to set, then serve at room temperature.
Nutritional Information
Per serving (1 cookie, assuming 24 total):
- Calories: 192
- Total Fat: 8.8g
- Saturated Fat: 5g
- Cholesterol: 27mg
- Sodium: 68mg
- Total Carbohydrates: 28g
- Dietary Fiber: 1g
- Sugars: 15g
- Protein: 2.3g
How to Serve Chocolate Peppermint Sandwich Cookies
Serve these cookies on a decorative platter at your next gathering for a delightful treat that surprises guests with its festive flavor. Pair them with a glass of cold milk for a classic combo, or serve them alongside hot chocolate or coffee for a cozy afternoon snack. They also make lovely gifts when packaged in a decorative tin, sharing the joy of baking with friends and family.
How to Store Chocolate Peppermint Sandwich Cookies
Store your Chocolate Peppermint Sandwich Cookies in an airtight container at room temperature for up to five days. If you want them to last longer, you can freeze the unfilled cookies for up to three months. Just make sure to layer them with parchment paper to prevent sticking. Let them thaw at room temperature before frosting and serving.
Expert Tips for Perfect Chocolate Peppermint Sandwich Cookies
- For a softer cookie, avoid overmixing once the dry ingredients are added. Just mix until combined.
- Make sure your butter is at room temperature for easy creaming with the sugars.
- If you don’t have heavy cream, regular milk or even a dairy alternative works well for the frosting.
- Using different types of chocolate chips (dark, milk, or even white chocolate) can change the flavor profile to suit your taste.
- For those with peppermint extract sensitivities, feel free to substitute it with vanilla for a different twist.
Delicious Variations
- Mint Chocolate Chip: Replace a portion of the chocolate chips with mint chocolate chips for an extra minty flavor.
- Gluten-Free Option: Substitute all-purpose flour with a gluten-free blend to make these cookies gluten-free.
- Peppermint Bark: Instead of rolling in crushed candy canes, melt chocolate and drizzle it over the assembled cookies, then sprinkle with chopped candy canes.
Frequently Asked Questions
Can I use margarine instead of butter?
Yes, you can use margarine, but it might slightly alter the flavor and texture. Unsalted butter is preferred for the best results.
How do I ensure my cookies don’t flatten out?
Make sure to chill the dough before baking. This helps them maintain their shape and prevents spreading.
Can I make the dough ahead of time?
Absolutely! The cookie dough can be made in advance and stored in the fridge for up to three days or frozen for up to three months. Just remember to thaw before baking.
Conclusion
These Chocolate Peppermint Sandwich Cookies are a festive delight that combines rich chocolate and refreshing peppermint, making them a must-try for any occasion. Whether you’re baking for a gathering, gift giving, or just satisfying a sweet tooth, this recipe is sure to impress. Try making them at home, and transform your kitchen into a holiday haven with the delicious aroma of freshly baked cookies. Don’t forget to leave a comment and let us know how your cookies turned out! Happy baking!