Ice cream cakes are a beloved dessert, but nothing quite beats the combination of Oreos and ice cream. Whether it’s for a birthday, a summer get-together, or just a special treat, an Oreo ice cream cake is always a hit. In this guide, we’ll walk you through everything you need to know to make this delicious dessert, including variations, serving suggestions, and common mistakes to avoid.
Ingredients Needed
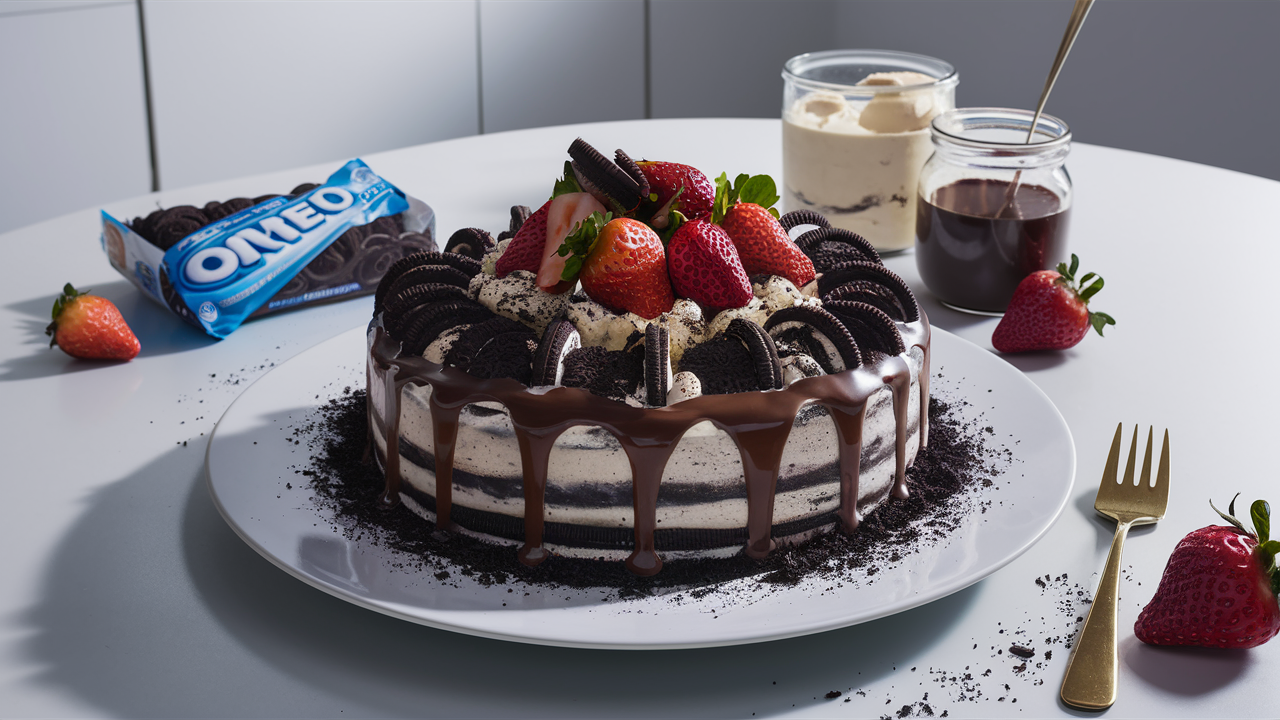
To make an Oreo ice cream cake, you’ll need the following ingredients:
- Oreo cookies (for the crust and layers)
- Vanilla or cookies and cream ice cream
- Chocolate fudge sauce
- Whipped cream
- Optional toppings: chocolate chips, peanut butter, or caramel
You can easily adjust the ingredients to suit your taste or dietary needs. For example, swap out regular Oreos for gluten-free Oreos or use a dairy-free ice cream alternative.
Step-by-Step Guide to Making Oreo Ice Cream Cake
Here’s how to create this delectable dessert:
- Prepare the Crust:
- Crush Oreo cookies until fine. You can use a food processor or a rolling pin.
- Mix the crushed cookies with melted butter, then press the mixture into the bottom of a springform pan to form a firm crust.
- Create the Ice Cream Layer:
- Let the ice cream soften for a few minutes until it’s easy to spread.
- Spread a thick layer of ice cream over the Oreo crust.
- Optional: Add a layer of chocolate fudge sauce or whipped cream on top.
- Add More Layers:
- Repeat the process by adding another layer of crushed Oreos and ice cream.
- Finish with a topping of whipped cream and more crushed Oreos.
- Freeze and Serve:
- Freeze the cake for at least 4 hours or overnight until it’s fully set.
- When ready to serve, remove from the freezer, slice, and enjoy!
For more ideas on homemade ice cream to use in your cake, check out this guide on making homemade ice cream.
Top Variations of Oreo Ice Cream Cake
If you’re feeling adventurous, try these delicious variations of the classic Oreo ice cream cake:
- Peanut Butter Oreo Ice Cream Cake: Add a layer of peanut butter between the ice cream and Oreo layers.
- Mint Oreo Ice Cream Cake: Substitute regular Oreos with Mint Oreos and use mint chocolate chip ice cream.
- Vegan Oreo Ice Cream Cake: Use dairy-free ice cream and gluten-free Oreos for a different twist. For more dessert ideas, check out these vegan dessert options.
For an alternative cookie pairing, consider serving your Oreo ice cream cake alongside these Earl Grey Cookies, which offer a delightful contrast in flavor.
Serving Suggestions
Wondering when to serve your Oreo ice cream cake? Here are some ideas:
- Birthday parties: It’s a fun and crowd-pleasing option.
- Summer BBQs: Cool down with this refreshing treat.
- Holiday gatherings: Add a festive twist by topping with holiday-themed sprinkles or candies.
Pair your Oreo ice cream cake with a cold glass of milk or a hot cup of coffee for the perfect dessert experience. For those interested in a more exotic sweet treat option, explore Mexican Candy Traditional Sweets to diversify your dessert offerings.
Storing and Freezing Tips
If you have leftovers (although that’s rare!), you can store your Oreo ice cream cake in the freezer. Here are some tips:
- Storing: Wrap the cake in plastic wrap and aluminum foil to prevent freezer burn. It should last up to a week in the freezer.
- Thawing: Let the cake sit at room temperature for 10-15 minutes before slicing to make it easier to cut.

Common Mistakes to Avoid
Creating an Oreo ice cream cake is a fun and straightforward process, but a few common missteps can lead to less-than-ideal results. To help you make the best cake possible, here are some mistakes to watch out for and how to avoid them.
1. Over-Melting the Ice Cream
One of the key steps in making an Oreo ice cream cake is getting the ice cream to the right consistency for spreading. If the ice cream becomes too melted, it can soak into the crust and other layers, making the cake soggy and difficult to handle.
- How to Avoid It: Soften the ice cream just enough so that it’s spreadable but still holds its shape. You can leave the ice cream out at room temperature for about 5-10 minutes. If you accidentally melt it too much, you can place it back in the freezer for a few minutes to firm it up slightly before spreading it on the cake.
2. Using the Wrong Type of Oreos
Not all Oreos are created equal when it comes to making an ice cream cake. Flavored or reduced-fat versions may not provide the same taste or texture as the original, which can affect the overall quality of your dessert.
- How to Avoid It: Stick to classic Oreos or trusted variations like Mint Oreos if you want to add a twist. Flavored Oreos might alter the taste in unexpected ways, and reduced-fat Oreos might not hold up as well when used in the crust or layers.
3. Skipping the Freezing Time
Rushing through the freezing process is a common mistake that can lead to a cake that doesn’t hold its shape. A properly frozen cake is essential for clean slices and a stable dessert.
- How to Avoid It: After assembling your cake, give it enough time to freeze solid. Ideally, freeze the cake for at least 4 hours, or overnight if possible. If you’re short on time, aim for a minimum of 2 hours, but be prepared for a softer cake. Proper freezing ensures that the layers stay intact and the cake holds its shape when cut.
4. Not Compacting the Oreo Crust Enough
The Oreo crust serves as the foundation of your cake, so it needs to be firm and well-packed. If the crust isn’t compacted enough, it might crumble when you cut the cake, leading to a messy presentation.
- How to Avoid It: When pressing the crushed Oreos into the pan, use the back of a spoon or the bottom of a measuring cup to apply even pressure. Ensure that the crust is evenly distributed and tightly packed so that it holds together when you slice the cake.
5. Uneven Layering
Layering is an essential part of building an Oreo ice cream cake, but uneven layers can result in an imbalanced cake. Some sections might end up with too much ice cream or too many cookies, which can affect both the look and taste.
- How to Avoid It: As you assemble the cake, take your time to ensure each layer is even. Use a spatula to smooth out the ice cream and evenly distribute the crushed Oreos across the surface. Consistent layers will give your cake a professional appearance and balanced flavor in every bite.
6. Cutting the Cake Too Soon
After all your hard work, it’s tempting to dive right into your Oreo ice cream cake as soon as it comes out of the freezer. However, cutting into the cake too quickly can cause it to crack or fall apart.
- How to Avoid It: Let the cake sit at room temperature for about 5-10 minutes before slicing. This short wait allows the cake to soften just enough for smooth, clean cuts. Use a sharp knife to cut through the cake without damaging the layers.
7. Overloading the Cake with Toppings
While it’s fun to get creative with toppings, adding too many can make the cake difficult to slice and eat. Overloading the cake with toppings like whipped cream, sprinkles, or extra cookies can also overshadow the flavor of the main ingredients.
- How to Avoid It: Keep toppings simple and balanced. A light drizzle of chocolate sauce, a few extra Oreo crumbles, or a dollop of whipped cream can add the perfect finishing touch without overwhelming the cake. Less is often more when it comes to decoration.
8. Not Lining the Pan Properly
Lining your cake pan with parchment paper or plastic wrap can make it much easier to remove the cake once it’s frozen. Skipping this step can make it difficult to get the cake out of the pan in one piece, especially if it sticks to the sides.
- How to Avoid It: Before you start assembling your cake, line the bottom and sides of your pan with parchment paper or plastic wrap. This will make it easier to lift the cake out once it’s fully frozen and prevent any sticking or breaking.
9. Forgetting to Plan Ahead
Oreo ice cream cakes require time to assemble and freeze properly, so planning is key. If you’re making this dessert for a special occasion, it’s important to start the process early enough to ensure the cake is ready when you need it.
- How to Avoid It: Make sure to allow enough time for each step of the process, from assembling the ingredients to freezing the final product. If you’re preparing the cake for an event, consider making it a day ahead to ensure it has plenty of time to set.
Frequently Asked Questions (FAQs)
Can You Make Oreo Ice Cream Cake Without a Springform Pan?
Yes, you can! Use a regular cake pan lined with parchment paper. The paper will make it easier to lift the cake out once it’s frozen.
How Long Can You Store Oreo Ice Cream Cake?
Stored correctly, an Oreo ice cream cake can last up to a week in the freezer. Be sure to wrap it tightly to prevent freezer burn.
What Are the Best Ice Cream Flavors to Use?
Vanilla and cookies and cream are classic choices, but you can also experiment with chocolate, mint, or even coffee ice cream.
Can I Make Oreo Ice Cream Cake with Homemade Ice Cream?
Absolutely! Homemade ice cream adds a personal touch and allows you to control the ingredients. Here’s a guide on how to make homemade ice cream if you want to try it out.
Conclusion and Final Thoughts
An Oreo ice cream cake is a versatile and delicious dessert that’s sure to impress. Whether you stick to the classic recipe or try one of the variations, this cake is perfect for any occasion. Don’t forget to experiment with different flavors and share your creations with friends and family!
By following these tips and guidelines, you’ll be well on your way to creating a dessert that’s not only delicious but also unforgettable. Enjoy your Oreo ice cream cake!